Showing posts with label Lumos. Show all posts

7 May 2013

Sandcastles By TarasTalons

 
 My indie polish arrived today. I hate waiting for things and it was so annoying having to wait over the bank holiday!

This colour is a polish made by TarasTalons, the company was featured by me in a previous post. Life In Lacquer also has an exclusive discount for 20% off with no minimum spend!

This is three coats with a topcoat. I did find that it wasn't as smooth going on as some polishes but the top coat sorted that out and this colour is lovely!
I even got a compliment in the shop today and I never do! Which is strange when you think about all the designs I usually have!

I think this is a pretty polish and I really love having a polish which is a limited edition so I know that I am one of the only people in the world to have this shade!!


22 Apr 2013

How to Make Your Own Nail Decals, Simples!


Well then Lacquer Lovers have you ever had problems with placement of individual konad stamps? Or have you ever wanted to premake some hand painted decals for another time or for a friend?
 
Here's a new way of getting them perfect!
 
I'm feeling like a nail genius today!
 
Okay so here it goes....
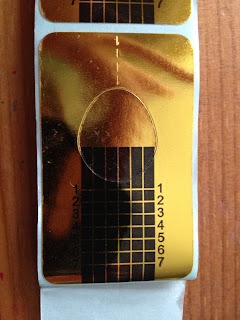
First you need to fine something that the nail polish will remove easily from. I chose a Nail Form. nail forms are used in acrylic nail sculpting.
^This is a nail form^
 
 
Then i used my Lumos Top Coat and placed a thick coat over the top of the form
Leave this to dry. I left to dry over night as I had forgotten about it... Oopsies :)
 
Then loosen it from the nail form.
 
^This is the nail polish "film" That you have made to stamp on to^
 
 
Stamp into the Nail Polish "film"
Cut to size
Then place onto your nails and topcoat over
 
TADA!
  EDIT: You could also use it to embed things like a pretty napkin or thin fabric by following all previous steps but just dont wait for the polish to dry on the form, add when its wet. Then add one more coat of clear polish ontop when dry.
Okay so its not perfect as you can see a slight line if you look really closely at the nail but I'm sure there are ways around this. This is my first attempt. You could try actually cutting around the image so there is no border?
You could also hand paint tour design instead of stamping using either acrylic paints or nail polish.
 
Give this a try and email me some pics and ill upload them for other to see on here :)

21 Apr 2013

Nautical Nails again :)

 
 I apologise for the messiness of this application, i had a few problems with this design and i was getting abit annoyed ;P
 
OK so here we have another nautical design using Barry M polishes.

I used Cheeky Plate CH36 from the summer 2012 collection.
Stamped using Barry M Gelly Pomegranate and Blackberry.
Base is Barry M White
Holographic striping tape and diamante to finish.

I do love this design as i really like this stamp, but i maybe should have kept all the nails the same design as i think it looks abit "busy"


I used Lumos top coat to help the tape stay down and i left the polish a good hour before applying and is STILL smudged the stamping.
does anyone have any tips on how i can prevent this?
I'm thinking of changing to Seche Vite as i find the Lumos only completely dries on professional polishes and not on budget or high street ranges. I find it works really well on China Glaze for instance but not very well on say Barry M or Kleancolor.


23 Mar 2013

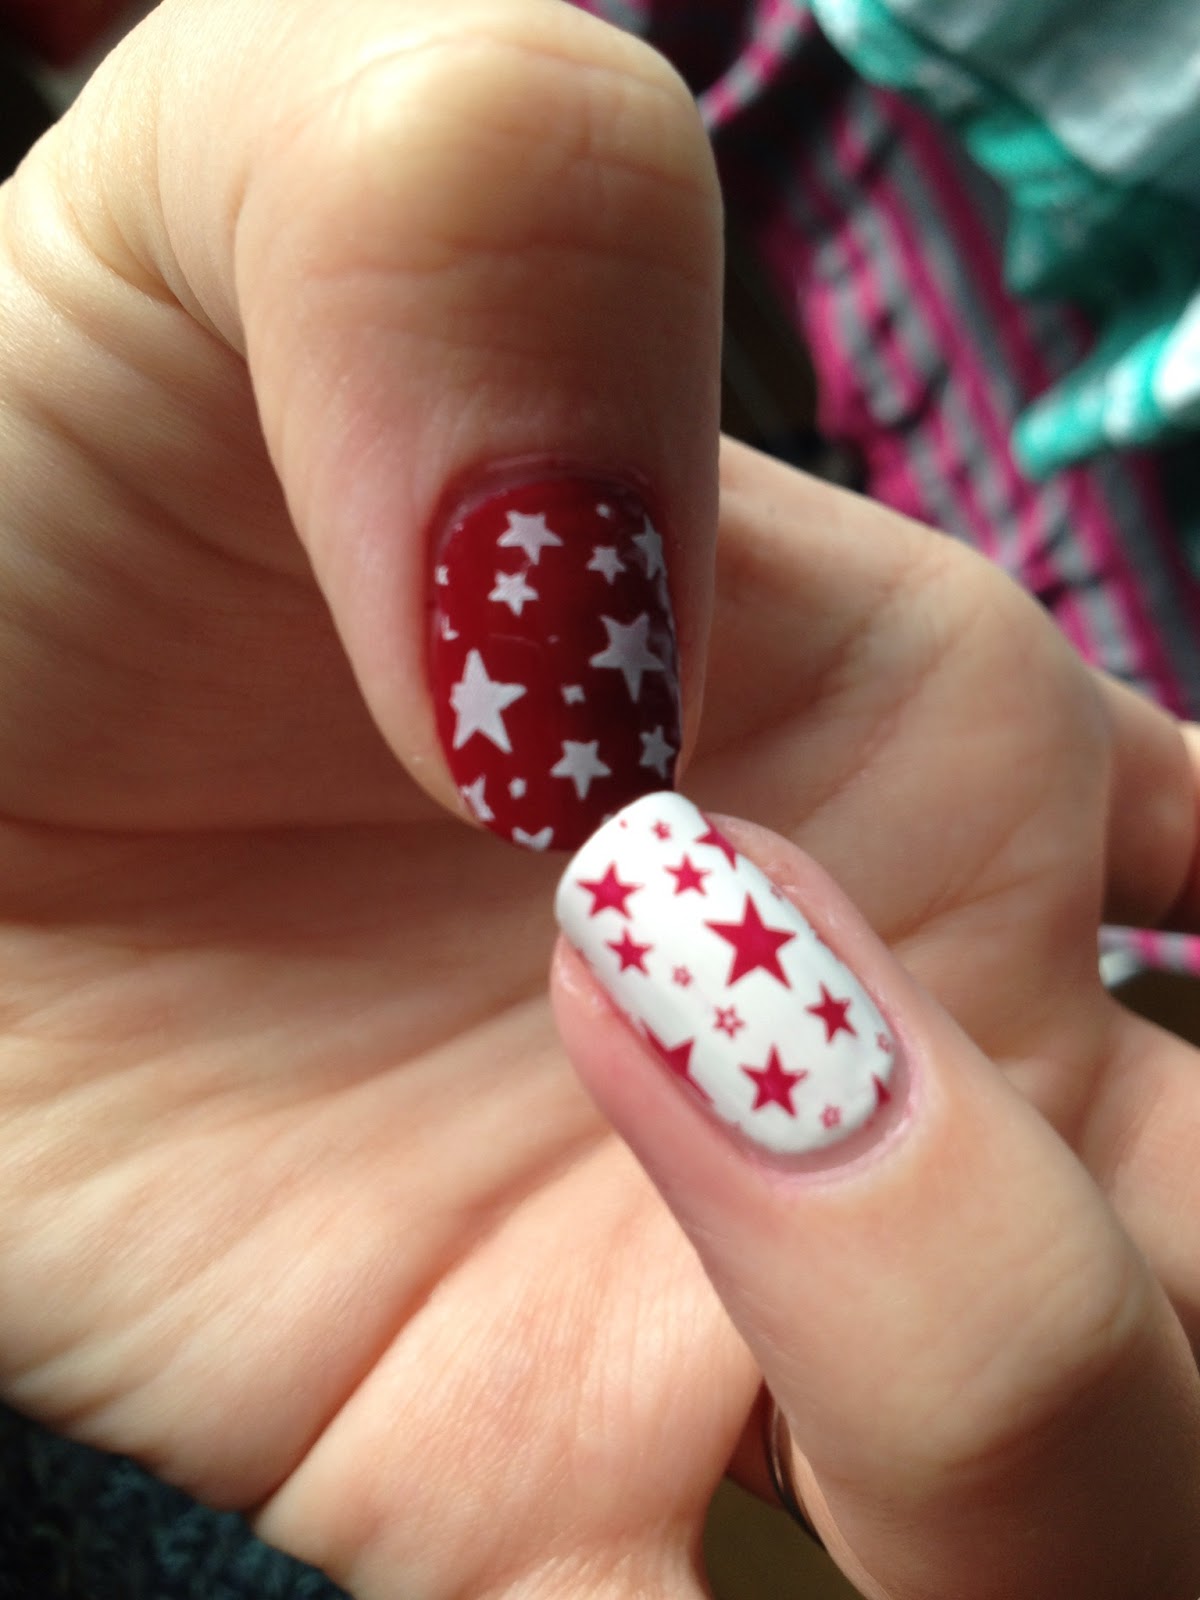
City Siren With Star Stamping

 
China Glaze's City Siren x 2 and NYC French Tip White
 
 
Beautiful starry design using a Cheeky stamping plate, purchased from Amazon.co.uk
Cheeky plate, like bundle monster, are a cheaper version of Konad. The quality of the plates are pretty much the same and they have some beautiful designs.
I choose cheeky and bundle monster over konad any day.
 
 
I think the feature nails look great in this design, but i think i would have prefured white stars on all the nails, not just the thumb.
I love China Glaze, Of course :p, and this colour is a lovely shade.

15 Mar 2013

Plum And Leopard Stamping


2x Coats Of Plum By Kleancolor. Bundle Monster stamping Plate 221 and NYC white to do the leopard print. 

 
Please bare in mind that the NYC polish is very old and thick that's why it is so good for stamping, so don't chuck away your thick old nail polish! It'll come in very handy for stamping
 
As I've mentioned before, i love nail stamping and I love Bundle Monsters Plates. They work just as well as Konad but at lower cost.
I also used to use stamping alot when i was doing other peoples nails and it really is a crowd pleaser and people always comment on my nails when i have stamping on.
 
i prefer to just have stamping on the ring fingers on maybe the thumb too but this design would look just as lovely on all fingers.
 
Feature nails, as i call them, are very fashionable and if you look at celebrity nails you will find lots of people with just the ring finger "accessorised." Making this style suitable for both work and play as its not too "in your face"
 
This Kleancolor polish is very thin and didn't cover very well.Patchy and Streaky :( If using this colour again i would do 3 coats.
 
Ive been finding the Kleancolor with lumos bottom and base coat has not been lasting long at all on me. I think its my fault as i think i put the kleancolor on too thick. I have never had a problem of polish lasting on me when i use China Glaze and Lumos. China Glaze is a much better polish obviously, but it still doesn't really bother me as i don't tend to wear polish for more than a day :P

9 Mar 2013

Cute stripy and dotty Kleancolor Pattern


Kleancolor Pastel Purple & Barry M White
 Cute Spots And Stripes
I used striping tape to do the stripes but it didnt come out as crisp as i hoped. **EDIT** the reason it didnt come out very crisp is because i left the tape on too long. Always remove tape when polish is still wet.
Then dotting tool to do the spots.


4 Mar 2013

Monochrome With a Hint Of China Glaze


Monochrome with a splash of colour :) 

Hello again :) second post of today, think I'm getting abit addicted. Well who wouldn't want to talk about nails all day eh?! 
Today I've Chosen monochrome, classic! But then added a slash of colour to make it a tad more lively

I purchased some striping tape today and surprisingly I have never used striping tape before. 
So I decided to have a bit of a play. 
I used Barry M white and black and China Glaze Papaya Punch. 

Started off with Lumos Basecoat, of course! No nail staining for me :P 

I used two coats of Barry M white, I was in a rush so in a bid to seal the polish and speed up drying time I then used the Lumos top coat. 

When that was COMPLETELY dry I then got creative :) I have never used striping tape before so I just wanted to have a go. Firstly it was a bit of a pain to get dead on straight so it is abit on the wonk, with more time and practice I'm sure that will improve. 

After I had done my designs with the tape I then painted over the top with Barry M black and China Glaze Papaya on the ring finger. There are all some very small glitter fragments on the thumb and ring finger. 

Then topped it all off with Lumos top coat. 

Unfortunately I was in a rush to get out of the house and put on the topcoat prematurely, resulting in a slight drag of colours. As I as it was just a practice so at least ill know for next time. 

This way of doing stripes I will use again, imagine the possibilities!


3 Mar 2013

Lumos Top and Bottom coat


Lumos high speed top coat and instant impact bottom coat are bought to us by Famous Names, who you may know is run by Jim and Linda Nordstrom, Jim was the co creator of CND until it was sold and is now also the creator of Sweet Squared. Sweet squared is an online supplier for the nail professional and also they run salon geek. 


I have owned these polishes for only a week but already I am so glad I listened to other professionals and purchased these. They came so highly recommended by other nail techs and I was worried they wouldn't live up to expectations but boy was I wrong! (And you won't catch me admitting that often!)

The base coat has a thin consistency but it is not hard to apply at all and dries instantly to form a bond between the nail plate and colour. 
The top coat can be applied to wet nails, although I have not tried this as I am always worried about the colour tinting the top coat. It dries COMPLETELY in 20 mins if that! I have never used a top coat that actually does what it says and I had no smudges or chips, I even went in the bath pretty much straight after applying. 

The box boasts that the polishes can be used right until the end of the bottle without becoming gloopy but as I've only just bought these I can't comment on that even though I have heard good things. 

Usually I can't wear polishes for more than a day without them peeling and chipping but this product keeps the colour firmly in place without it being hard to remove when the time comes. 

As with all coats of polish remember to cap the free edge to ensure longevity. 


This is a professional only product and I purchased mine here
www.ellisons.co.uk 
Check them out here +Ellisons Hairandbeauty 

Top marks for Lumos!!