Showing posts with label stickers. Show all posts

30 Dec 2014

OMG nail strips review

*PRODUCT SAMPLE, PLEASE SEE DISCLOSURE FOR DETAILS*


Howdy!
Can you believe Christmas is over? Its been a whole month since I blogged last but it seems like forever ago.

I was sent these nails strips a while ago from OMG Nail Strips. I do apologise for taking an age to get them up but life sometimes gets in the way, especially over the festive period!

OMG nail strips Geometric design stickers

To hear my honest thoughts on these please join me after the JUMP!

18 Oct 2014

Star Water Decals from Sparkly Nails

PRESS SAMPLE

Hello!
Today I have some water decals from Sparkly Nails to show you, Water decals are so easy to use and I would recommend them to people who are not comfortable in hand painting or looking for something that is quick and easy to do but yields great results.

Star decals from Sparkly Nails review gradient glitter


I chose to use some Essie polishes and gradient them, I then added some glitter to the middle to fingers!
To read all the details and see more pictures then join me after the jump!

21 Jul 2014

Life in Lacquer Nail Art Challenge: BLUE featuring Video Tutorial

Another #lifeinlacquerjuly mani. How are you all liking the challenge so far? I hope your enjoying seeing others work on my Instagram!

Ive been totally overwhelmed by all the people taking part! I thought no one would so I am sooo happy you are all joining me on this!


Today is another very broad prompt...Blue. 
I chose to get my Nail Stickrs out for this one. Maybe it would have been more suited to the Geometric prompt but oh well :)

Nail Stickrs geometric blue nail art

Nail Stickrs geometric blue nail art


AND theres a couple videos to accompy this too! Im getting there with the whole video thing. I still find them quite hard and awkward to film but I am getting there. 
Again these are fast so I can put them on Instagram. Do you think I should make longer versions for Youtube? 

Here is how I did the gradient.....
 

And here is how I used the Nail Stickrs to create a sponge chevron.


I hope the videos go a little way in showing you how I did this look.
I am really interested to know what you think about them so please do let me know.

For this look I used Essie Butler Please, Avenue Maintain and Sweet Talker. I also used Moyra 304 on the chevron nail. 
All of this was one ontop of a white base
And then of course it needed some bling! These beautiful metal star charms are from Effect Beauty. I love them! They are slightly curved so fit to the nail really well unlike other flat charms, plus you get a decent amount for your money.


Soooo what do you think? Please check out the other blog entries from Life in Lacquer July below!

**some of the products featured were sent to me as press samples. All opinions are my own**

25 Jun 2014

Lightening Nail Art using Nail Stickrs

A quick, simple and easy nail art today!

This look is so easy to do all you need is two polishes and some nail vinyl stencils. These ones are from Nail Stickrs.
Nail Stickrs are an American based brand but they ship to the UK for about £1.50 ish so very reasonable! I also happen to know that they have some very exciting new styles coming soon!


I used Moyra 602 and Jasmines Wish (853). Jasmines Wish is a stunning textured polish. A teal with a golden glitter effect.


I have really tried to get this colour as accurate as possible, it was a pain to photograph! 
Doesn't it look like a Drusy?!

Its formula is great. Cover fantastically in 2 coats and of course you don't need top coat! 


I love pairing textured polishes with ordinary ones!
What do you think of this? 

Nail Stickrs are available from Here. Moyra has a brand new website Yay!! You can find it Here.


Press sample. Some of these products were sent for my honest review. 

23 Jun 2014

Lace Floret Water Decal Nail Art

Hello!!
It feels like ages since I blogged last. Super busy getting crochet things made... Ive even bought a label maker. This just got real!

These dainty water decals were sent to me by Sparkly Nails. Sparkly Nails are based in the UK and stock a massive range of nail art items.


Water decals are so simple to use. All you have to do is cut the one you want out, remove plastic and then soak in water for a few seconds. Slide the decal off of the sheet and then on to your nail.... Simples!


The only thing that can make them a tad harder to use is seeing the white decal on the blue backing paper but holding them up to the light helps.


I made the ombre using a make up sponge and Moyra 912 Jacqueline and Manhattan 67N. Manhattan don't name their polishes and it really bugs me when nail polishes don't have names. I think its part of the fun (especially if they are humorous names, I'm talking about you OPI )

These decals and many others are available from Sparkly Nails


*press sample, please see disclosure for details*

6 Jun 2014

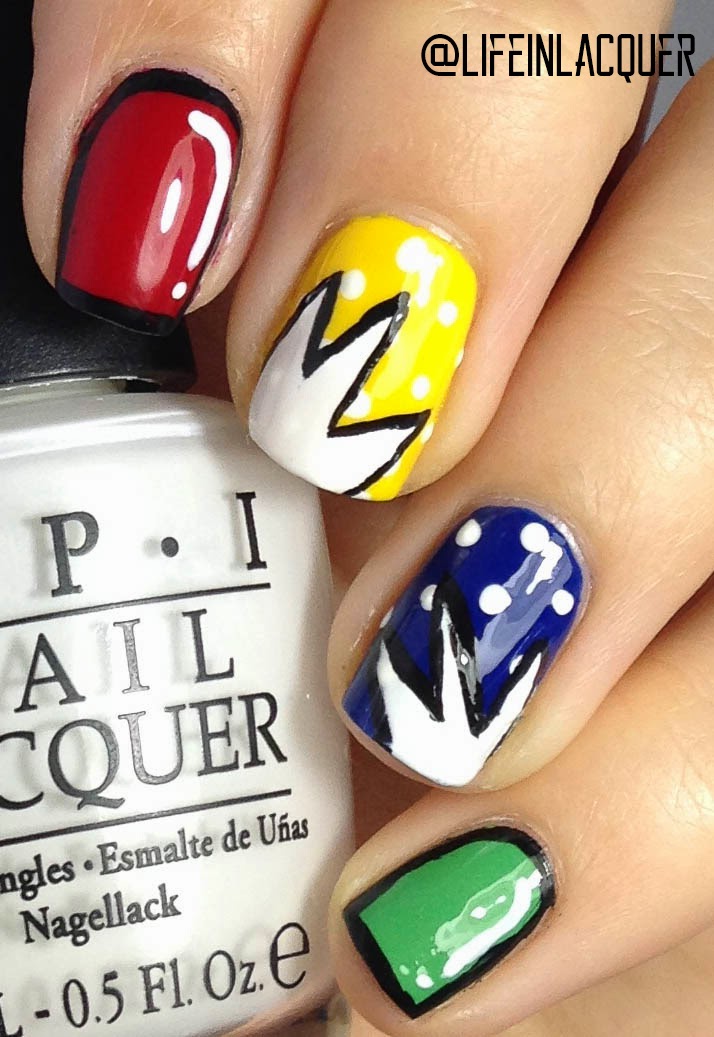
Cartoon Nail Art

I have always wanted to do a cartoon themed mani. In fact I did one a while back but it sucked sooo bad!


I started by picking out some bold primary colours. I thought It would be easy but it turns out I own like one of each!

I chose Chick Me Out by KBShimmer, Mojito Madness by Essie, Keeping Suzi At Bay by OPI and Red Passion by Maxfactor Glossfinity.

I started by doing two coats of each colour on each nail then waiting a little before adding the designs. I used acrylic paint and my fave brush, St Petersburg by Moyra UK, to do the designs. If you are in need of some really fantastic nail art brushes for acrylic nail art I really could not recommend Moyra enough. Aliz is fantastic and will help with any questions you may have :)

I then top coated and waited overnight before I used Nail Stickrs to make the "boom" shape. I was going to write Boom and Pow in them but I made them too small :(


The only reason I waited overnight was because it was SOOOO late by the time I finished this (about 2am) I didn't want to risk mucking it up.

I placed the Nail Stickrs where I needed them and made sure to press down along the nail walls. Then applied Alpine Snow by OPI over the top. I always remove the stencils when the polish is WET. I feel it works so much better and is less likely to ruin the design.

Using St Petersburg I outlined the explosions with black acrylic paint. Added topcoat by KBShimmer and....
TaDa all done!

Again the vinyl stencils worked wonders! I am loving them right now.

Nail Stickrs are available to purchase HERE (they do ship to UK) and you can see another mani I did using Nail Stickrs HERE


*some of these products were sent to me as a press sample. My opinions honest and of course my own*

19 Feb 2014

Blue Flower Nail Art

Today I have some pretty stickers from Sparkly Nails to show you.

I really wanted to use my new Girly Bits polish called Cosmic Ocean so I used it over this LAME gradient. It is so much more noticeable in real life but pastels are my enemy! I can never get them to show their true colours!


Cosmic Ocean is so sexy. It makes a huge difference to the polish and mani overall. It gives it a blue iridescent glittery shimmer that really makes it pop!

I used BarryM Gelly in Guava with Blueberry sponged onto the ends. If you squint you may be able to see it!!

The stickers are very easy to apply, they are the spongy type of stickers. After I have applied the stickers I just top them off with a top coat. 
I think they go really well with the blues.

You can buy these stickers and other nail art bits HERE and you can check out Girly Bits HERE

Hope you are all having a good week so far!


*these stickers were sent to me for review. All opinions are my own HONEST thoughts and ramblings*

8 Dec 2013

First Christmas Nails!! Snowflake Stickers

This is my first Christmas post EVER!! 

I have been sent these lovely snowflake stickers from Sparkly Nails to try out!

They are a bumpy 3D texture, spongy almost LOL! 

They come in various sizes and look fab with Color Clubs Otherworldly! 


Otherwordly is a bright blue jelly with holo glitter. Unfortunately you cant really tell its holo glitter on the nail but you can in the bottle. It basically just looks like silver glitter. 
Still pretty though! 

 The stickers can be purchased HERE 


**one or more of the items featured here have been sent to me for my HONEST review. Please see my disclaimer for more details**

27 Jun 2013

Starry Night


 I was sent a few packets of nail stickers From Nailtopia and I found it really hard to decide which ones to use as they are all soo pretty! 

Today Ive chosen to use these stars. They are gold glitter and they have a really high glitter content. 
They actually look like they are made from the glitter i also have on my nails, not like overly sticky out like stickers usually are. 

Nailtopia sent these and i received them the next day! I love not having to wait for things. 

I used the same technique I used for the Trees nail art HERE 
The background is BarryM Blueberry Ice Cream with BarryM Cobalt Blue and BarryM Gelly in Guava. 
The glitter is my all time fave Kleancolor 24 Carat. I use this glitter more than i use any other glitter, its beautiful!

To purchase these stickers and a wealth of other nail art supplies check out Nailtopia HERE 


*These decals were sent to me for an HONEST review by Nailtopia. The views on this product are COMPLETELY my own.*

21 Jun 2013

Lady's and Magenta-men with Water Decals


 This is Lady's and Magenta-men by OPI. 
I received this as a gift from my husband along with the water decals.
I'm not even really sure what the decals are supposed to be pictures of LOL 

But never the less, they are pretty!

Lady's and Magenta-men is quite similar to China Glazes Fuchsia. 
A shimmery Bright,bold pink. 
Pictured here with 2 coats and Poshe topcoat.
 I can just imagine this shade on my toes whilst sitting out in the sun, a proper summery shade. 

The black pearls are from eBay.

12 May 2013

Something Blue

 
These are my take on the Bridal Weekly Challenge on the nail Polish Lovers Community on Google+
 
I was going to do a nude pink but I saw this Pastel Bue By Kleancolor and I thought this blue shade would make a nice change.
"Something Blue"
 
I used 2x coats of Kleancolors Pastel Blue
Lace Nail Stickers
Flat Back Faux Pearls
1x coat of Poshe
As you can probably see I smudged a few of them when I applied the stickers.
 
I have noticed that a lot of fast drying topcoats do not speed up the drying time of Kleancolor? I have no idea why?! But its really frustrating as I always expect it to be dry and make silly mistakes, like this :(
 
And I couldn't even redo it as I ran out of stickers boooo :(
 

22 Apr 2013

How to Make Your Own Nail Decals, Simples!


Well then Lacquer Lovers have you ever had problems with placement of individual konad stamps? Or have you ever wanted to premake some hand painted decals for another time or for a friend?
 
Here's a new way of getting them perfect!
 
I'm feeling like a nail genius today!
 
Okay so here it goes....
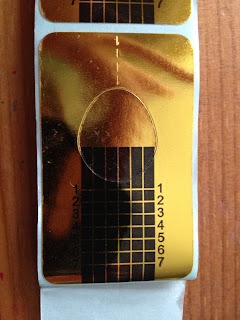
First you need to fine something that the nail polish will remove easily from. I chose a Nail Form. nail forms are used in acrylic nail sculpting.
^This is a nail form^
 
 
Then i used my Lumos Top Coat and placed a thick coat over the top of the form
Leave this to dry. I left to dry over night as I had forgotten about it... Oopsies :)
 
Then loosen it from the nail form.
 
^This is the nail polish "film" That you have made to stamp on to^
 
 
Stamp into the Nail Polish "film"
Cut to size
Then place onto your nails and topcoat over
 
TADA!
  EDIT: You could also use it to embed things like a pretty napkin or thin fabric by following all previous steps but just dont wait for the polish to dry on the form, add when its wet. Then add one more coat of clear polish ontop when dry.
Okay so its not perfect as you can see a slight line if you look really closely at the nail but I'm sure there are ways around this. This is my first attempt. You could try actually cutting around the image so there is no border?
You could also hand paint tour design instead of stamping using either acrylic paints or nail polish.
 
Give this a try and email me some pics and ill upload them for other to see on here :)

12 Apr 2013

Star Manicure Design, Peel Offs


I went to my Nans and had a rifle through her craft room, that's right a whole room dedicated to craft *swoon* In her card making supplies i found some peel offs and thought i could use them as stencils......
and it worked! i use tape for alot of my nail art anyway so i suppose its not much different.
 
just make sure the nail polish is really, truly dry before you put the stickers on or it'll peel off the polish.
 
The cuticles are a half star
 
i used Essie Neo Whimsical and Barry M Gelly Pomegranate
 
Ive used Neo Whimsical alot recently but i just love it. Its a lovely spring colour.