Showing posts with label sponge. Show all posts

13 Nov 2014

MoYou London Nail Stamping Plate Review and Tutorial

PRODUCT SAMPLE


Hello my loves, I am so sorry I haven't posted in a while. Things are really hectic here in the run up to Christmas.

I have another review of a MoYou London plate for you today. I did another review and video tutorial a few weeks ago which you can view here.

I used two polishes from my recent China Glaze haul to do this although you can barely see the colour difference but I can assure you in real life it was very noticeable.

MoYou London stamping nail art review and tutorial china glaze ombre gradient

To see how I did this look and to hear my full opinions on this plate please join me after the jump.

23 Sept 2014

Bright Watercolour Effect Nail art

Hello my lovelies!
Been another stressful week, will I ever get used to the school routine?!

I have no idea what to call this nail art. Its bright and reminds me of slushed watercolour with perhaps an Indian sari type theme? I have no idea!
Well anyway here it is....


Watercolour Nail Art With Stamping glitter moyou

For more pictures and a how to video click read more....


4 Aug 2014

Life in Lacquer Challenge:INSPIRED BY ANOTHER NAIL ARTIST OR BLOGGER

Ill start of by apologising. I am really late on this prompt but I do have a good excuse I swear!!

As you can see we have had a big change here at Life in Lacquer.... We are now a dot com! This is a big step for me and its really made me feel quite accomplished!
I also have a fantastic new layout courtesy of Shiny Magic. They are so reasonably priced and was really easy to install.

Okay so back to the last prompt of the Life in Lacquer July Challenge. I chose one of my fave bloggers Let Them Have Polish.
She did a fantastic look called Rainbow Ombre and she also made a tutorial. All of which can be found on her original post.

Here's my take...


I used the exact method she did my following her YouTube tutorial

The colours I chose are bright so to me it looks a bit like a galaxy nail art! 


The shades I used were

Moyra Bubblegum Limoncello 622
Moyra 102
China Glaze Electric Beat 
OPI Pink Friday 
Manhattan 67N
Essie Mojito Madness
CND Vinylux Cream Puff (base) 


I used Sick Lacquers Pastel Fusion over the top to give it some glitz. This bottle is not pictured in the bottle shot (I forgot, sorry!)

I then matted it all using Mentality Matte Top Coat. I love this topcoat and the effect it gives. 

The clean up wasn't great as I got it everywhere, but I am still happy with the look. I also found Let Them Have Polishes video really easy to follow. 

So what do you think of this nail art? 

Also what are your thoughts on the new look? There's more to come with the look so its a work in progress.

10 Jun 2014

Fantasy Unicorn Nail Art

This has got to be the cutest, most girly nail art I have ever done!


I used some nail vinyl stencils from She Sells Seashells for the unicorn. I know I have been doing loads of reviews for Nail Stickrs recently but of course they are not the only supplier and they do different stencils too. She Sells Sea Shells is also based in the UK.
They were easy to use and I got a great result too! I used Konad stamping polish in white to do them as it covers better than other whites.


You also get the cut outs left in the middle so they can be used as stickers :) 

I used Zoya Robyn, Unnamed Color Club Glitter, Essie Cascade Cool and Zoya Mira

I used Essie Cascade Cool as the base. Its such a powdery sweet pink. I really love it. Then used a sponge to splodge on the two +Zoya Nail Polish. Topped off with the Color Club glitter.
I hate that they don't label half the Color Clubs! I think its all the ones that come in sets that remain unnamed.

The metal charms are from eBay. I think I payed like £1 for a wheel with loads of different designs.

What do you think of my unicorn fantasy nails? I LOVE them!

I think I may be turning into an actual girly girl! HELP!

You can browse and buy various stencils and other nail art items from She Sells Seashells HERE


*some of these products were provided as a press sample for my honest review*

11 Jul 2013

Nail Luxxe Guest Post Week 2


 Hi everyone, Nail Luxxe here!
Jade's let me pop over again to show you another look :)
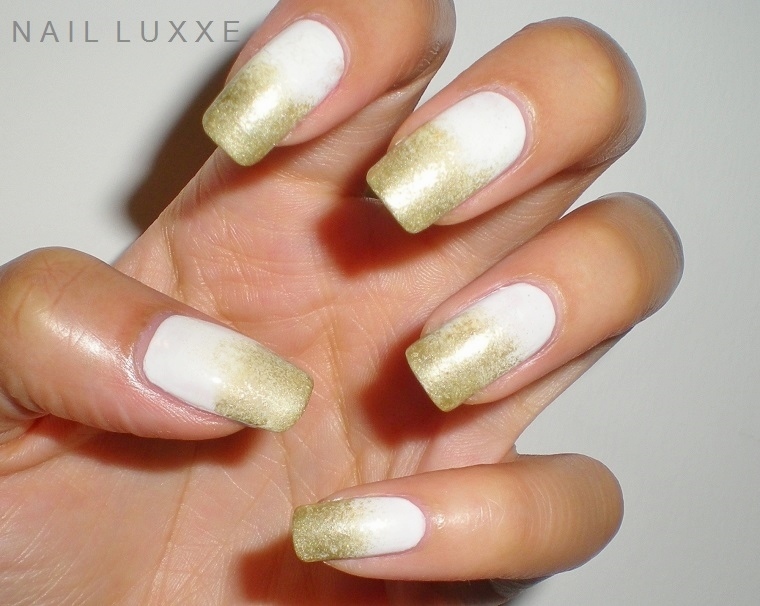
White and gold is one of my all time favorite colour pairings. So I decided to translate that onto my nails in today's manicure, which uses all Barry Ms.
Starting with one coat of White I painted the whole nail and waited for it to dry.  Then I went in with a beauty sponge and dabbed Barry M's Gold Foil from the top of the nail to the centre, easing the pressure as I went.  (If it wasn't for Jade I wouldn't even know that this is referred to as a 'mottling technique'!) To complete it, I added a coat of topcoat.
For some reason it makes me think of desert sand, maybe because of the textured effect. Or it could have something to do with the beautifully hot weather we've been having lately!
I hope you have a great rest of the week.

Nail Luxxe xoxo
You can check out Nail Luxxe HERE

8 Jul 2013

Zebra Print Nail Art

 
Here I have again used the mottling technique used in posts HERE and HERE
I think this is one of my most fave techniques as its so easy to do and cant be achieved on both hands easily.
 
I used BarryM's Blueberry Ice Cream as a base then used BarryM's Guava, OPI If You Moust, You Moust for the mottling and Accessorize Damselfly for the glitter.
 
I used a Bundle Monster Stamp for the zebra print but I also painted over it with black polish to make it stand out more.
 
Hope everyone has had a lovely weekend!


2 Apr 2013

Leopard Nails,Roar!


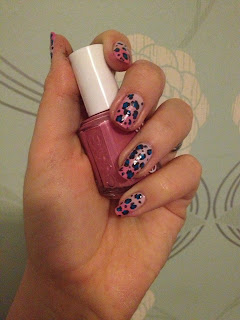
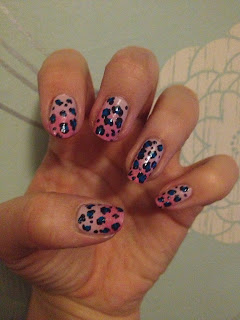
I'm feeling feisty today so here are some gradient leopard print nails.
Ive never done free hand leopard print before and it was soo easy! Just use a dotting tool to place you main colour then draw black around in a broken circle.

I think i may have put too many actual print marks on though as they look a bit crowded?

Here's how i did it.....
Three coats of Essie-- Neo Whimsical
which doesn't give a complete streak less covering but it doesn't matter as Ill gradient over it.


Then do the gradient using a sponge, I literally used a washing up sponge, a brand new one obviously :P
I used Essie--Flawless
this also doesn't have to be super good as you'll be painting over the top.


Then add the print. I used Kleancolor--Neon Aqua for the blue and Barry M--Black for the outline.
Barry M polish was abit thin to be fair but its the only black i could find! Surprisingly as i own sooo much polish!


And that's it!