Showing posts with label colour. Show all posts

24 Jul 2014

Life in Lacquer Nail Art Challenge July: FLORAL

After a little faux pas on monday, some of you may have already seen these! I was sat in my car looking at lions in Longleat when my twitter went a bit mental as I had published the wrong post DUH!

Today's prompt is Floral... I decided to give one stroke another go.I wanted to do something very feminine so decided to use pink and of course some glitter!


A couple days ago I bought the Cupcakes and Champagne collection by Ruby Wing from a nail friend only and I couldn't resist using one!
If you didn't know the collection of polishes are all scented and they change in the sunlight!
The scent is strong even with a topcoat on, its divine!

For this look I used Essie Neo Whimsical and Color Club Strawberry Shortcake. The roses are painted using some acrylic paint.

My one stroke still needs loads of work and my middle finger is the worst but I do still like the look of this nail art and I am pretty proud of the results.

You can see the other challenge entries below and please go and give them a view. 


20 Jun 2014

Dance Legend Thermal 175

WOW.
I love this thermal. Thermals are polishes that react with heat and change colour. If your nails are long enough you may be able to get a beautiful ombre effect!

Dance Legend 175 is a deep purple that changes to an orangey/pink red when warm. It is quite reactive and the colours are quite different so the change is very noticeable. It doesn't have to get really cold to change to you do get the see the dark purple quite a bit which is great.


The shimmer really makes this polish stand out, it makes it different from a lot of other indie thermals which have big, chunky glitter.

The formula is great. Only 2 coats needed. Pictures show 2 coats with topcoat.

I will admit something embarrassing now... I have a macro lens for my IPhone (Yes I use an IPhone for my pics) I have been using said macro lens wrong. Instead of using the macro I have been using the  wide angle lens... DUH!
Now I have figured it out I can do lovely up close images yay!

I added a little floral accent using a Vamp striper brush and white acrylic paint. I then added some diamantes to add some glitz.

I hope you love this as much as I do. This is my type of thing!

I won this polish in a giveaway run by Nail Stickrs. This came from Rainbow Connection but you can also buy direct.

23 Mar 2013

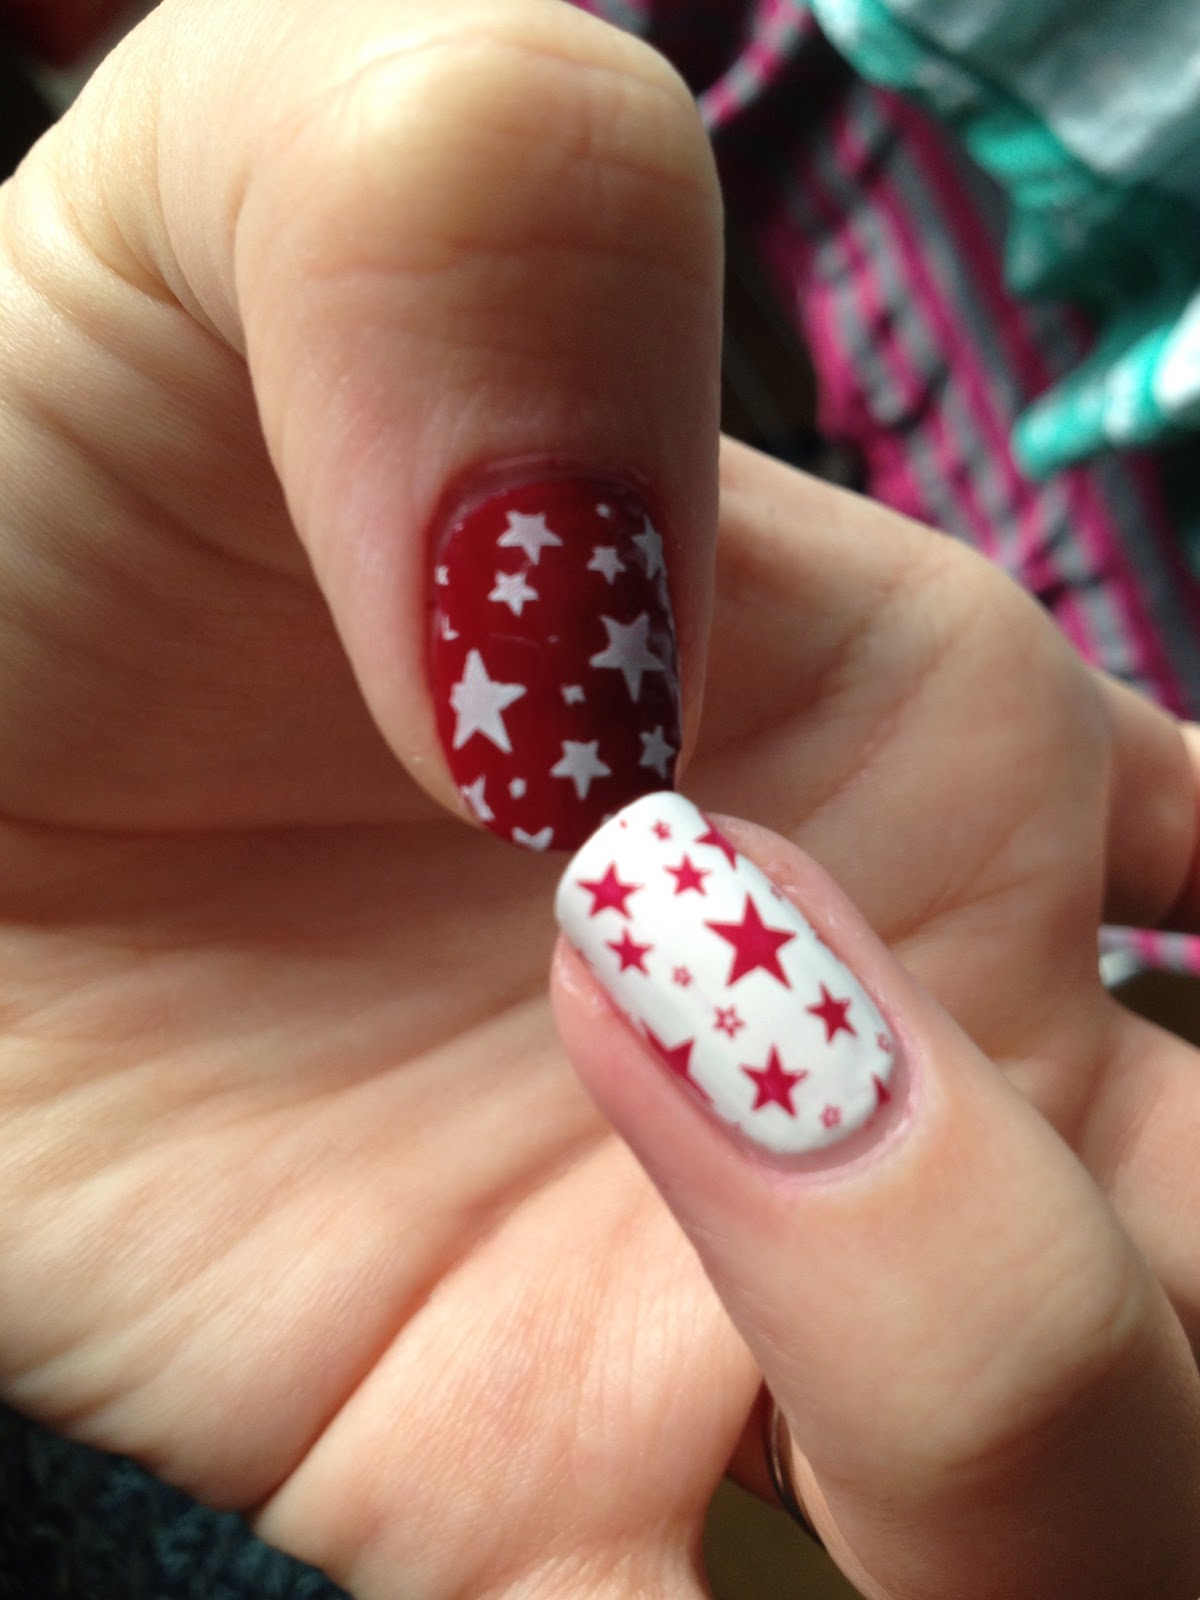
City Siren With Star Stamping

 
China Glaze's City Siren x 2 and NYC French Tip White
 
 
Beautiful starry design using a Cheeky stamping plate, purchased from Amazon.co.uk
Cheeky plate, like bundle monster, are a cheaper version of Konad. The quality of the plates are pretty much the same and they have some beautiful designs.
I choose cheeky and bundle monster over konad any day.
 
 
I think the feature nails look great in this design, but i think i would have prefured white stars on all the nails, not just the thumb.
I love China Glaze, Of course :p, and this colour is a lovely shade.

5 Mar 2013

Oyster nails, a new nail trend of 2013?!


Well good morning all, so I saw this picture in Scratch magazine and it really caught my eye.

The oyster nail has been all over the catwalk this season but will people start wearing this, in my opinion,strange nail design?

It can't be too practical I mean think of all the stuff that's going to get stuck under there, gross!!


I also would imagine they would get caught on everything! Nothing worse than a nail ripping off!! Ouch!! 
I'm not keen on this at all and can't see it being practical for an everyday audience but it sure is a talking point for the fashion world! 
Would you wear these? 


4 Mar 2013

Monochrome With a Hint Of China Glaze


Monochrome with a splash of colour :) 

Hello again :) second post of today, think I'm getting abit addicted. Well who wouldn't want to talk about nails all day eh?! 
Today I've Chosen monochrome, classic! But then added a slash of colour to make it a tad more lively

I purchased some striping tape today and surprisingly I have never used striping tape before. 
So I decided to have a bit of a play. 
I used Barry M white and black and China Glaze Papaya Punch. 

Started off with Lumos Basecoat, of course! No nail staining for me :P 

I used two coats of Barry M white, I was in a rush so in a bid to seal the polish and speed up drying time I then used the Lumos top coat. 

When that was COMPLETELY dry I then got creative :) I have never used striping tape before so I just wanted to have a go. Firstly it was a bit of a pain to get dead on straight so it is abit on the wonk, with more time and practice I'm sure that will improve. 

After I had done my designs with the tape I then painted over the top with Barry M black and China Glaze Papaya on the ring finger. There are all some very small glitter fragments on the thumb and ring finger. 

Then topped it all off with Lumos top coat. 

Unfortunately I was in a rush to get out of the house and put on the topcoat prematurely, resulting in a slight drag of colours. As I as it was just a practice so at least ill know for next time. 

This way of doing stripes I will use again, imagine the possibilities!